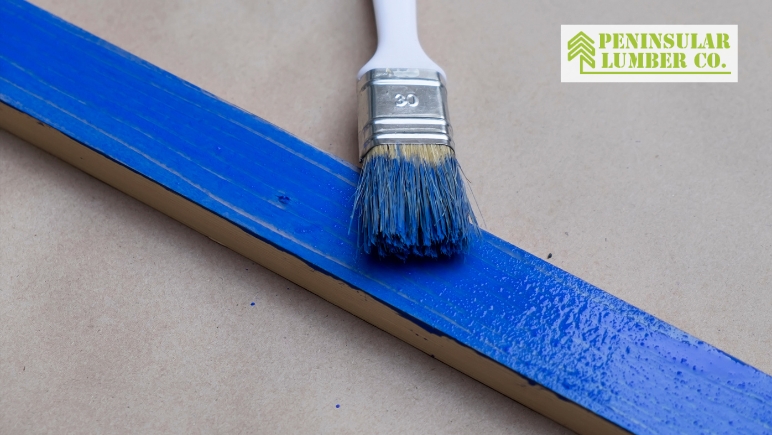
As a trusted lumber company in Tampa, we understand that custom home builders and DIY enthusiasts often wonder whether they can paint treated lumber. Pressure-treated wood is an excellent option for building materials because it resists decay and rot caused by insects and moisture.
However, can you paint treated lumber? In this blog post, we will answer that question and provide some tips on how to paint pressure treated wood properly.
Can You Paint Treated Lumber?
Yes, you can paint pressure-treated lumber, but you need to take some extra steps to prepare the wood. Pressure-treated wood is treated with chemical preservatives to prevent rot and decay. The chemicals in the wood can interfere with the adhesion of the paint to the surface. Therefore, you need to follow some steps to ensure the paint adheres well to the wood.
Pressure-treated lumber is a popular choice for outdoor projects, such as decks, fences, and pergolas, because it is resistant to moisture, rot, and decay. However, painting treated lumber can be a bit challenging, as the chemicals used to treat the wood can interfere with the adhesion of paint.
To answer the question, can you paint treated lumber? We will guide you through the process of painting treated lumber in detail, so you can achieve a beautiful and long-lasting finish.
Step 1: Let the Wood Dry
The first and most crucial step in painting treated lumber is to let it dry completely. Freshly treated lumber is wet from the chemicals used in the treatment process, and the moisture content can be as high as 25-30%.
Painting wet lumber will result in poor adhesion, bubbling, and peeling of the paint. Therefore, it is essential to let the wood dry out for at least a few weeks, depending on the climate and the size of the lumber.
You can check if the wood is dry enough by using a moisture meter, which measures the moisture content of the wood. Ideally, the moisture content should be between 12 and 15% for painting.
Alternatively, you can perform a water droplet test to see if the wood is dry. If the water beads up on the surface of the wood, it is not ready for painting. If the water soaks in, the wood is dry enough for painting.
Step 2: Clean the Wood
Once the wood is dry, the next step is to clean it thoroughly. Dirt, dust, and other debris can prevent paint from adhering to the surface, so it is essential to remove them before painting.
You can clean the wood using a pressure washer, which uses high-pressure water to blast away dirt and grime. Make sure to use a fan tip and keep the pressure low to avoid damaging the wood. Allow the wood to dry completely after pressure washing.
If you don’t have a pressure washer, you can clean the wood using a solution of warm water and a mild detergent, such as dish soap. Use a scrub brush or a sponge to apply the solution to the wood, working in small sections. Rinse the wood thoroughly with a garden hose and let it dry completely.
Step 3: Sand the Wood
After the wood is dry and clean, the next step is to sand it lightly to remove any rough spots or splinters. Use 120-grit sandpaper or a sanding sponge to sand the wood, working with the grain. Don’t sand too aggressively, as this can damage the surface of the wood and create uneven spots. Wipe away the dust with a clean cloth or a tack cloth.
Step 4: Apply a Primer
The next step is to apply a primer to the wood. A primer is a preparatory coat that helps the paint adhere to the surface of the wood and provides an even base for the topcoat. Use a water-based primer that is specifically designed for use on pressure-treated lumber.
Oil-based primers are not recommended for treated lumber, as they can trap moisture and lead to cracking and peeling of the paint.
Apply the primer using a paintbrush, a roller, or a sprayer, depending on the size of the project. Work in small sections and apply the primer in thin, even coats, following the grain of the wood. Allow the primer to dry completely, according to the manufacturer’s instructions, before applying the topcoat.
Step 5: Apply the Topcoat
After the primer is dry, the next step is to apply the topcoat. Use a high-quality, 100% acrylic, water-based paint that is designed for use on exterior wood surfaces. Avoid using oil-based paints, as they can trap moisture and lead to cracking and peeling of the paint.
Before painting pressure treated lumber, apply at least two coats of a water-based primer. The primer will help the paint adhere to the surface of the wood. After the primer has dried, apply at least two coats of a water-based paint. If you prefer to use oil-based paint, you can use it, but you need to wait until the wood is completely dry.
Can you paint treated lumber?
You can paint pressure treated lumber, but you need to take some extra steps to prepare the wood for painting. Let the wood dry completely, clean it thoroughly, apply a water-based primer, and then apply at least two coats of water-based paint.
If you follow these steps, your pressure treated lumber will be ready to paint and look great for years to come. As a reputable lumber yard, Peninsular Lumber can help you find the best pressure treated lumber for your custom home building and home improvement projects.
We’ve worked with the residents and custom home builders in Tampa Bay for over 75 years. Visit our lumber store in Tampa Bay today!


